Happy Monday!
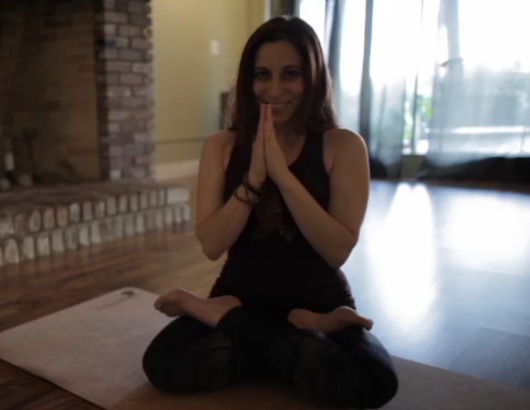
Today, I am thrilled to share with you a new partnership I’m launching with Monica Stone – Yoga for Everyone. Monica is a yoga lifestyle coach who blogs at The Yogi Movement. She loves coaching busy and overwhelmed individuals on how they can find time for yoga and health in their busy day. Her mission is to help as many busy people around the world stress less, find clarity and happiness by giving simple tips to integrate the practice of yoga and meditation no matter how much time you have.
As soon as we started talking about her goals, I realized they lined up perfectly with so many of my readers AND myself. So many of us are busy each day but finding just a few minutes in our week to invest in yoga can help clear our minds, relieve tension & stress, sleep better and help us think clearer. Each month Monica will share a 20 minute routine on the blog which will allow you to integrate yoga into your life while focusing on different body parts and ailments. This month’s installment is focused on yoga to help people who sit at a desk all day!
So now I’ll turn it over to Monica, our teacher for today’s 20 minute yoga class!
The work day is over. You’ve been looking forward to some sort of exercise to work out the knots in your shoulders and release the tension in your lower back. The problem is, you worked later than usual, and now you’re hungry, exhausted, and drained. You know some form of exercise would make you feel better after being scrunched in front of a computer all day, but you just can’t seem to motivate yourself to make it to the gym.
You say, "I’ll do it tomorrow." Will you? Didn’t you say that yesterday?
I’ve been there.
Take a deep breath because I can help with that.
 What if I told you that you could a yoga sequence in 20 minutes or under that would ease the tension in your mind and body, and it would feel like you got in a mini workout for the day?
I’m stoked to be writing this new series for Ashley because I have the perfect sequence of postures that will help release all of the tension and stress from sitting at a desk all day. Let’s get started.
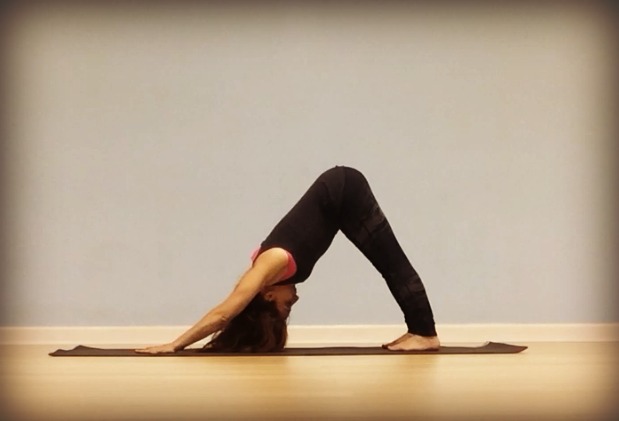
1. Downward Facing Dog
The first posture is called Downward Facing Dog. You’ve probably heard of it. This is the best posture to start with because you’re waking up and stretching each part of the body. Press your hands down and forward while spreading your fingers. Think of your fingers as the roots of a tree. Bring your feet hip width apart and push your heels down and back. No worries if your heels don’t touch the ground – just make the movement to get that nice stretch on the back of your calf muscles and heels. Engage your quadriceps to protect your hamstrings, and drop your head looking up towards your naval to give your neck a nice stretch. Hold this for five to ten deep breaths.

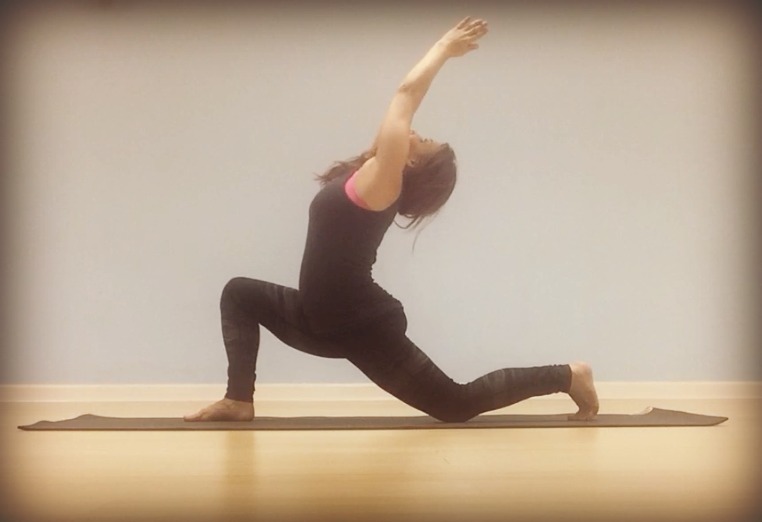
2. Crescent Pose
From Downward Facing Dog, bring yourself into Crescent Pose by stepping your right foot forward into a lunge, and dropping to the back knee. Lift your arms overhead, and slightly lean back to stretch and strengthen the spine. You’ll feel a nice stretch in your hips too. Look up towards the thumbs, and hold for five deep breaths, and then bring yourself back to Down Dog and switch legs. Hold for five breaths on each side.

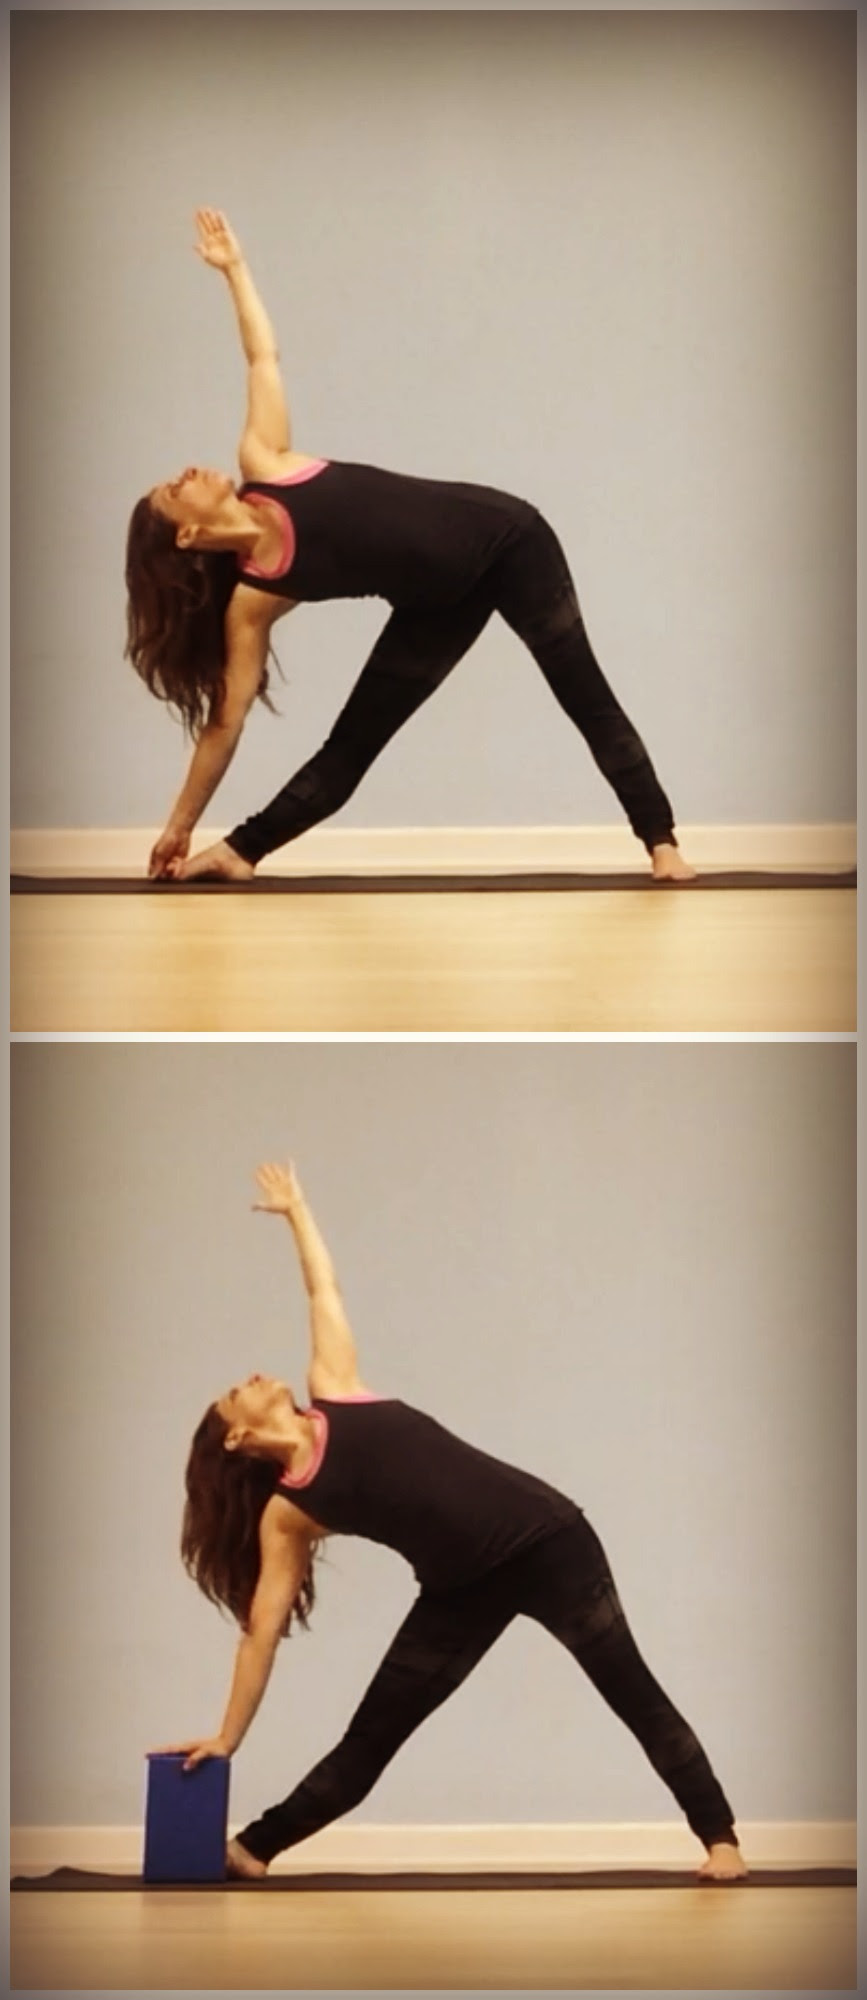
3. Triangle Posture
When you’re finished, bring yourself back to Down Dog, and then bring both feet to your hands. Come to a standing position at the front of the mat. Step your feet apart, and bring yourself into Triangle Posture. See the feet and hand positioning below. The full expression of this posture is to reach down and grab the big toe, and then reach up with the opposite hand and arm. What you want to achieve in this posture is the stacking of the hips and shoulders, and then an opposition of force between the arms and fingertips. Press down with your big toe as you pull up with your fingers, and really reach and extend through the fingers of the upper arm. This creates a really nice stretch between the shoulder girdle releasing any tension in the shoulders. You’ll also experience a nice side stretch on the stomach.
If your hamstrings or lower back feels tight, and you have trouble keeping the legs straight – go ahead and use a block or stack of books like I demonstrate in the picture below. Just don’t let the lower arm collapse. Press strong into the block as you reach up. Hold for five breaths on each side.
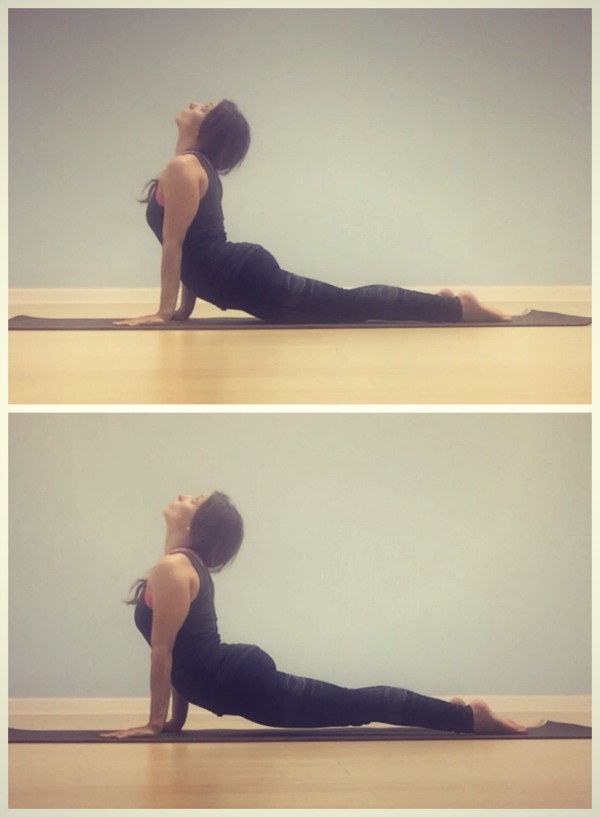
4. Upward Facing Dog
Bring yourself back to a standing position, and transition down to the mat by bring the hands down to the mat next to your feet in a standing forward bend, step back into a plank position and lower down.
Upward Facing Dog starts on the belly. Place your hands next to your shoulders, and start to straighten the elbows as you arch your back. It’s important to not throw the neck back here, but just slightly lift the chin up. Bring your gaze towards your nose to avoid throwing the head back. Roll your shoulders back, and press your big toes into the ground to avoid your heels falling outward. If you want more of a challenge, really strengthen your legs and lift your knees off the floor like the picture below.
Hold for five to ten breaths. When finished lower the body back down, and push back using the knees bringing yourself to a seated position.

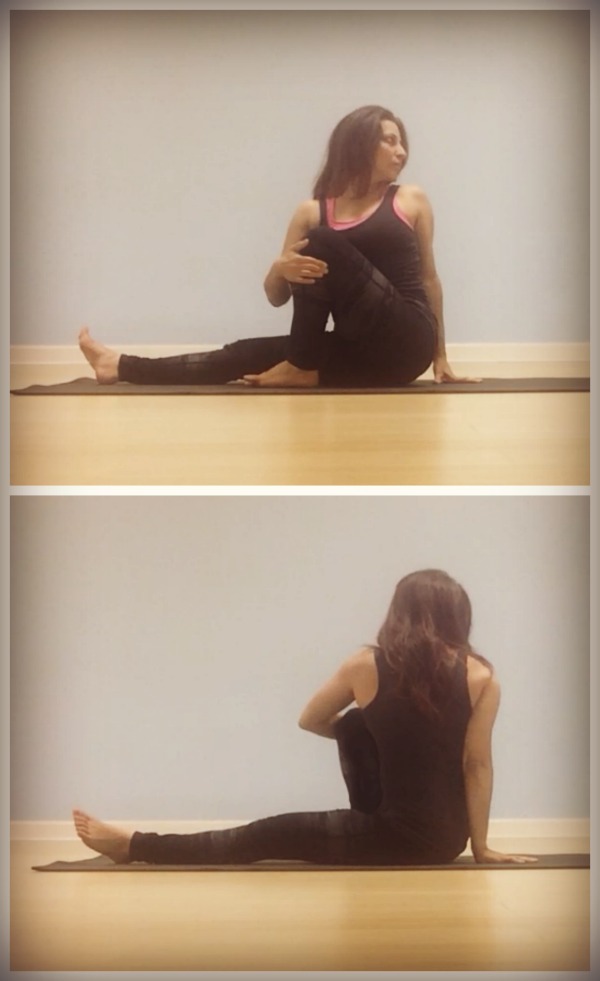
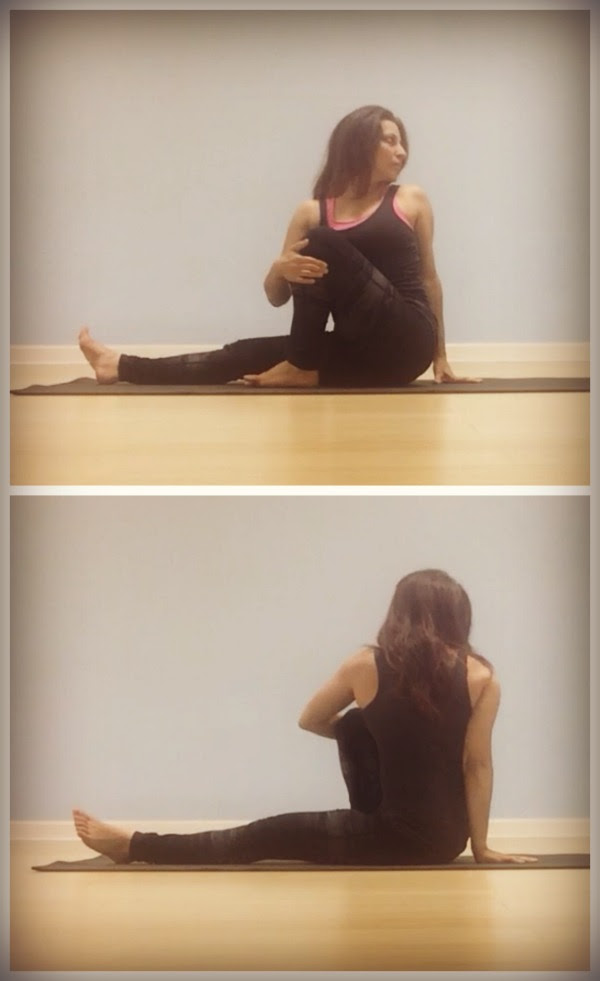
5. Seated Twist
Sit up with both legs extended, and bend the right knee up. Position the heel in line with the hip. The foot should not be touching the opposite leg, but rather a good amount of space between the thigh and the foot. The knee should be right over the ankle, and don’t let the knee fall to either side. Bring the left hand to the knee, and twist the body towards it. Bring the hand that’s behind you close to your spine, and twist as look over your opposite shoulder.
This postures creates a nice release on the lower back and hips, and opens the shoulders while stretching the chest. Hold this for five breaths on each side, and twist a little deeper on each exhale.
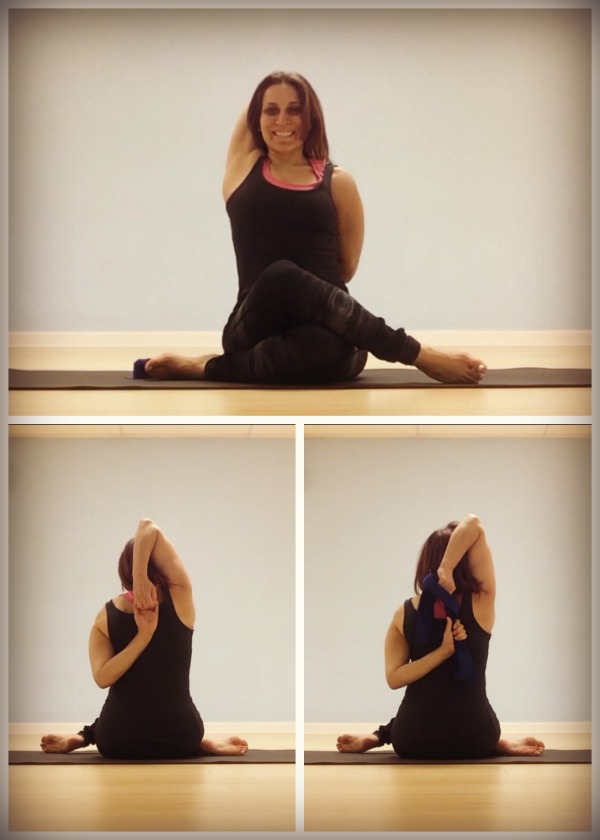
6. Cow Face Posture:
I know. This posture has a funny name, but it’s supposed to look like a cow face. From the seated twist; cross the right knee over the left and then stack the knees. Reach over your head with the right arm, and bring your hand towards the center of the upper back. Then bringing the left arm up from the bottom. You’re going to reach each hand towards the center of the spine, and try to clasp hands.
Once hands are clasped, start the push the head back and chest forward. Then, try to stack the elbows. If done correctly, this is becomes a really nice heart opening posture. You’re opening the shoulders, stretching the chest, and strengthening the spine.
If you’re not able to bring the hands together – no problem. Just use a strap like I show below. You can also grab onto a towel or your shirt.
Hold for five breaths, and repeat on the opposite side.

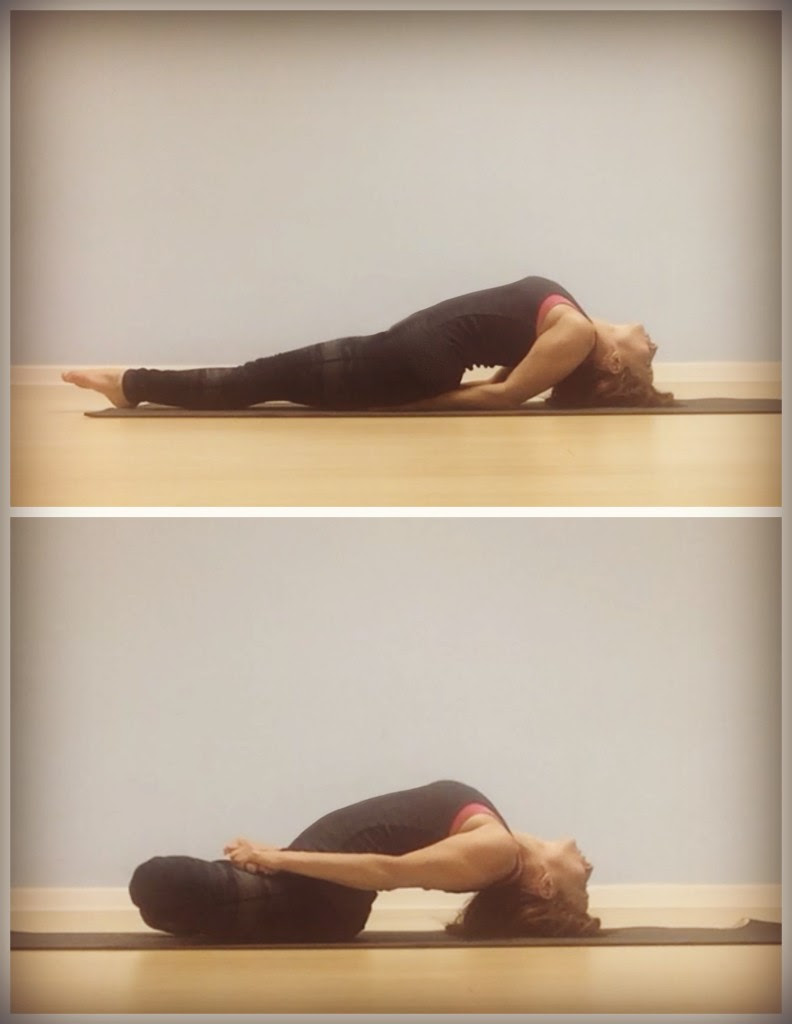
7. Fish Posture:
Bring yourself to the ground, but this time laying on your back. The best and easiest way to come into this posture is to sit on your hands with the palms face down. Straighten your legs, squeeze your legs together, and point your feet.
Here’s the tricky part, so listen carefully. The first thing you need to know is to never lift your head off the ground. It’s tempting to lift up, but don’t. All you need to do is press your forearms into the ground and lift your chest as you squeeze the shoulder blades together. The head stays on the ground and simply slides up so that the crown of your head is on the ground, and you’re looking behind you.
If you want to kick this posture up a notch, bring your legs into lotus and grab onto the feet. When you do this, press your knees towards the ground for a little extra hip opening and spine stretch.
If any of this feels too intense, just grab a block to place under your back, and mimic the posture that way.
8. Supine Twist
Lay all the way down on the ground, and then hug the knees into the chest. Bring the knees over to the right as you use your hand to press the knees towards the ground. Look over the opposite shoulder. Engage your lower belly, and work to draw your shoulders down towards the mat. This will create space in your lower back, and reduce upper back pain, neck pain and can help to strengthen upper back muscles while opening tight chest and shoulder muscles. Hold this posture around 10 deep breaths on each side.

When you’re finished with the supine twist, lay all the way down by extending your legs and arms. Close your eyes and return to a normal breath. This postures is called Savasana, and should be done at the end of every yoga practice to relax, restore, and absorb all of the energy you just created.
You’ll be surprised how a short practice like this will make you feel lighter in your body, less stressed in your mind, and create a pattern to help you through difficult situations daily.