I know that it’s been too long since I’ve posted a recipe. I apologize. Today, I’ll give you my recipe for healthy “fried rice” (spoiler alert – there actually isn’t any rice in this recipe).
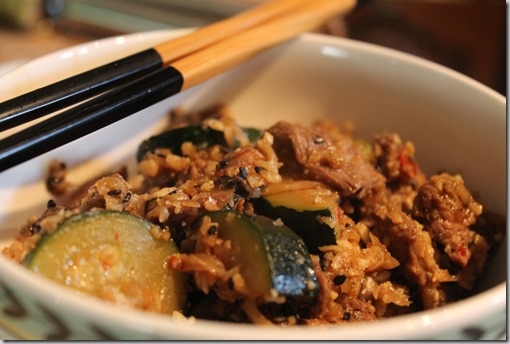
The first thing I would note is that this recipe is definitely not the only thing one can do with faux rice. The following recipe happens to be a fried rice dish with Japanese / pan-Asian flavors but one can do a number of things with this technique as inspiration; for example, this morning I also made a vegetarian Indian dish with the leftover ingredients.
Ingredients
For the Marinade:
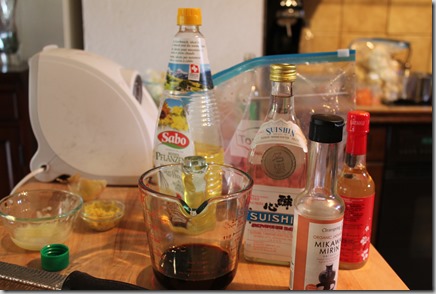
¼ Cup Low Sodium Soy Sauce
¼ Cup Sake
¼ Cup Rice Wine Vinegar
¼ Cup Mirin
½ Cup Vegetable or grape seed oil (DO NOT use EVOO as it is not a flavorless oil and the fresh olive flavor doesn’t really fit with Asian cooking)
2 Garlic Cloves (minced or you can use a garlic press)
Half a small white onion (grated)
1 Tbsp of fresh ginger (grated)
A Note on Grated Onions and Ginger:
I recently began grating rather than mincing ginger as I find the texture much more appealing especially when the ginger ends up in the final dish rather than just the marinade. You can use the smallest side of a box-grater, but a fine plane-grater is much better. As far as the onions go, for a marinade, this simply releases more flavor although mincing is generally fine too.
For the Stir Fry:
Vegetable or grape seed oil for cooking (same comment, DO NOT use EVOO)
~2 lbs of beef in smallish cubes (your choice on cut – sirloin keeps the cost down though this does well with a fillet as well – I’ve also done this recipe with lamb loin and it was absolutely fantastic)
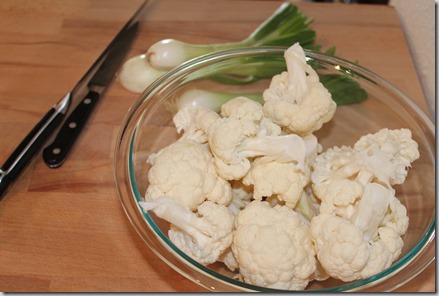
1 head of cauliflower (grated – this is the faux rice)
2 cups of sliced mushrooms (I think shitakes really make the dish shine but regular white mushrooms are okay too)
2 medium zucchinis halved lengthwise and sliced
4 scallions chopped on bias separate whites and greens (use 3 if they are really big)
2 Garlic Cloves (minced or you can use a garlic press)
1 Tbsp of fresh ginger (grated)
½ Cup of chopped Thai basil (optional)
A sprinkling of sesame seeds (optional)
Soy sauce, mirin and rice wine vinegar to season
Sambal Oleke as a garnish (if you like some kick)
A Note on Grated Cauliflower:
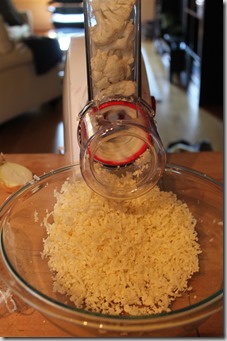
This is a really cool technique, one that I think is akin to spiralizing vegetables and using them as faux pasta. However, in this case, we are grating cauliflower to use in place of rice. It is very easy and you can use either the large side of a box-grater or a food processor if you have the right attachment (which is what I used in the picture below).
A Note on Stir Frying:
If you own an actual round-bottom carbon-steel wok with a wok ring adapter for your range, then you probably know WAY more than I do about stir-frying so you can skip this section (or this recipe altogether as you’re probably going to tell me that stir-frying is a Chinese cooking technique and these are Japanese / pan-Asian flavors, blah blah…). However, for all of us who learned western cooking first, even if you do own a wok, I would offer a couple of comments. First, woks are the traditional pans used for stir-frying. The problem is that a real wok completely rounded, which obviously doesn’t really work on the large majority of cook-tops.

The primary reason for the shape is its versatility: if this is the only pan you own, you can use it to steam, boil, deep-fry, sauté, roast, etc. In addition, the shape becomes incredibly important for stir-frying for a couple of reasons. First, the heat is concentrated at the very bottom of the pan allowing for it to get very hot very quickly after the cooking process cools it down. In addition, it allows the chef to push various elements up the side of the pan to increase the heat to some components while decreasing the heat to others. That’s all very interesting (and, by the way, the reason that I threw out my flat-bottom All-Clad wok as it is nothing but a large sauté pan with curved sides) but how do we replicate this technique with tools that almost every kitchen has? I find that the best result comes by par-cooking most elements separately before combining them in the end. That may sound a little more complicated but believe me, it’s well worth the effort.
1) Put the pieces of meat in the bag with the marinade and place in the refrigerator for at least 3 hours
2) Blanche the zucchini

1. Bring a large pot of salted water (should taste like the ocean) to boil
2. Add zucchini and cook until the pieces are still holding their shape but fork tender
3. Remove from boiling water and shock in a pre-prepared ice bath immediately to stop the cooking
3) Sauté the mushrooms (might have to do in two batches depending on your pan and feel free to add a few scallions as I have done below)
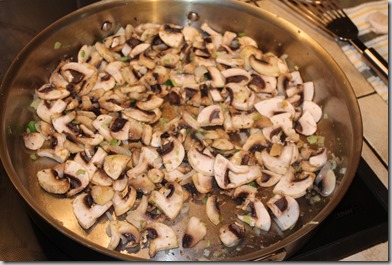
1. Place a large skillet over the stove on medium-high heat
2. When the pan is hot add enough oil to lightly coat the bottom of the pan
3. Add the mushrooms making sure there are not too many in the pan so they are crowded (if the mushrooms are crowded they will steam, not brown)
4. Sauté, adding a little salt to taste and set the mushrooms aside
5. Repeat the process if your pan was too small to do them all at once
4) Sear the beef – this part is very important because the beef WILL NOT brown unless it is done during this step

1. Remove the beef from the fridge at least an hour before cooking to allow it to come up to room temperature
2. Dry the beef thoroughly after removing it from the marinade
3. Place a large skillet (I like to use cast iron for meats) over the stove on medium-high heat
4. When the pan is hot add enough oil to lightly coat the bottom of the pan
5. Add the steak pieces making sure there are not too many in the pan so they are crowded (same comment here about steaming)
6. Quickly sear the beef making sure that each side browns but also that the beef doesn’t get overcooked (if the pieces are thin they should only be in the pan for 1 – 2 minutes each side)
7. Repeat the process if your pan was too small to do them all at once
5) Combine and finish the stir-fry
1. Place a large sauté pan on the stove over medium-high heat
2. Once the pan is hot, add enough oil to coat the pan and add the ginger, garlic, and the whites of the scallions
3. Sauté briefly until the aromas are released
4. Add the mushrooms, zucchini, and beef sequentially stirring as they are added to ensure the ingredients mix
5. Add the cauliflower and sauté with the other ingredients for about two minutes until it heats up, add a bit of soy sauce (maybe 3 tbsp, mirin (a bit less) and just a dash of rice wine vinegar
6. Cover the sauté pan and to let the cauliflower steam and soften a bit – 3 – 5 min
7. Add the sesame seeds and basil and toss
6) Serve in bowls with a bit of sesame seed, basil and sambal oleke garnish
I hope you all enjoyed this. I promise that there will be more coming soon and I’ll try not to make all of them so complicated. Keep reading for the next episode of Cooking with Bo.

 Ashley tells me she has a bunch of busy ladies here, so I have a feeling I’m not alone in my need for fast, easy, tasty weeknight dinners, right? Let’s get cooking!