Homemade Greek Dressing Recipe

Homemade dressings are the easiest way to make a salad that much better. When I tell people that I make my own dressing they often ask how hard it is and if they too can do it. I quickly assure them that it is not only easy but it also uses ingredients that many people already have in their pantry or refrigerator.  Trust me, after a little bit of trial and error, you’ll hardly ever buy bottled dressings.

Now, I have to give credit to Thomas Keller for this, in particular, Bouchon, one of my all-time favorite cookbooks.

IMG_0846[1]

Mr. Keller, of course, has many other cookbooks with incredible recipes.  However, Bouchon continues to be one of my go-to references as, despite sounding amazing, most of the recipes in Under Pressure (his sous vide cookbook) and the French Laundry Cookbook are so complicated that I’ve only ever attempted one or two of them.

The “House Vinaigrette” recipe from Bouchon has effectively inspired every salad dressing that I’ve ever made, and the key is the process of emulsification. Emulsions are VERY important in cooking. Many simple ingredients or finished products are emulsions though you might not even know it. Examples include milk, coffee, mayonnaise, and butter. Anything that is custard based or part of the hollandaise family is also an emulsion. What is an emulsion you ask? “Emulsion” is a term that describes the chemical process of suspending one liquid in another liquid when the two are usually immiscible (unable to be mixed) Think of oil and vinegar.  When you put the two in a bottle and shake, they mix but within a matter of minutes, you will have a layer of oil floating on a layer of vinegar. Again, that is because, oil is not soluble in vinegar. To change this, you need what we refer to as an emulsifier to stabilize the mixture. In the case of a vinaigrette, we use mustard. However, egg yolks are also a common emulsifier. Soy lecithin is another emulsifier which I have read about; however for now, that, along with xanthan gum, and other ingredients used in molecular gastronomy aren’t yet in my pantry.

I say that the simple vinaigrette is the inspiration for all my dressings because each one effectively starts with this recipe.  However, I would note that acids and oils can be interchanged.  This recipe uses red wine vinegar and canola oil.  However, I often use white wine vinegar to give it a more subtle flavor.  Substitute half the vinegar for lime juice, add some cumin and chili powder, and you immediately have Mexican vinaigrette.  Substitute the canola oil for nice EVOO, add a few shallots, roasted garlic, oregano, and swap some of the vinegar for some lemon juice, and you have an amazing Greek dressing. Substitute rice wine vinegar, peanut oil, miso paste for the mustard, and you get an incredible Asian style dressing.  The combinations are endless, and the point is that these are all very simple.

IMG_0748[1]

Below is a recipe for my Greek dressing which is a variation on Thomas Keller’s “House Vinaigrette.”  I used it to dress the Greek Salad we brought to the lakeside barbecue we had with friends last night. The dressing and salad was a huge hit and a few of our friends asked me to share the recipe!

Homemade Greek Salad Dressing

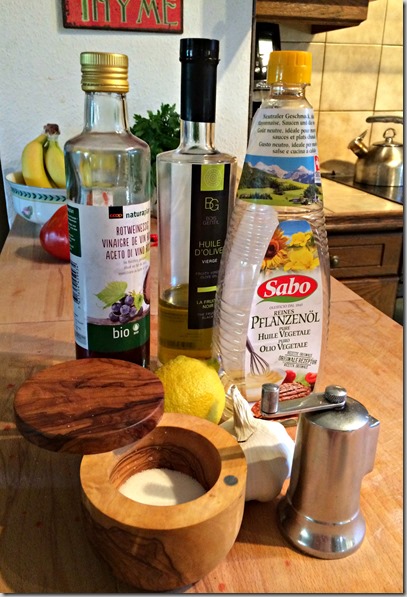
Homemade Greek Dressing Ingredients

Ingredients
Four cloves of garlic
Two tablespoons Dijon mustard
Two tablespoons red wine vinegar
Two tablespoons lemon juice
1/2  cup vegetable oil
1/4 cup extra virgin olive oil
1 tablespoon of dried oregano
Salt and pepper to taste
 

Preparation

Preheat the oven to 350 degrees. Smash three of the garlic cloves, drizzle on some olive oil, and roast in the oven for about 20 minutes.  Mince the raw clove and smash together with the roasted garlic (if you’re ambitious do this in a mortar and pestle and grind until smooth). Set aside.

Combine the olive oil and vegetable oil and set aside.  Combine the mustard, garlic, lemon juice, vinegar in a mixing bowl and whisk until well combined.  Then begin slowly adding the oil while whisking.  The oil should begin to incorporate into the mixture.  As it gets thicker, you can add the oil more quickly.  Finally, add the oregano and salt and pepper.

Share Button
Follow:

Cooking with Bo: Beef “Fried Rice”

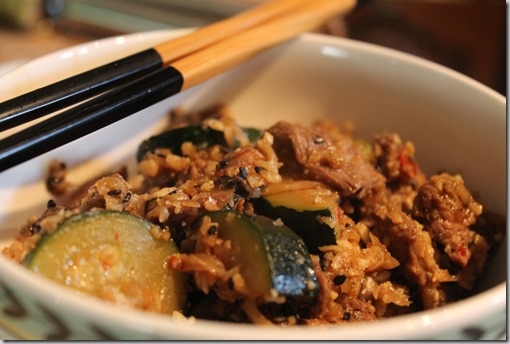
I know that it’s been too long since I’ve posted a recipe. I apologize. Today, I’ll give you my recipe for healthy “fried rice” (spoiler alert – there actually isn’t any rice in this recipe).

IMG_7008

The first thing I would note is that this recipe is definitely not the only thing one can do with faux rice. The following recipe happens to be a fried rice dish with Japanese / pan-Asian flavors but one can do a number of things with this technique as inspiration; for example, this morning I also made a vegetarian Indian dish with the leftover ingredients.

Ingredients

For the Marinade:

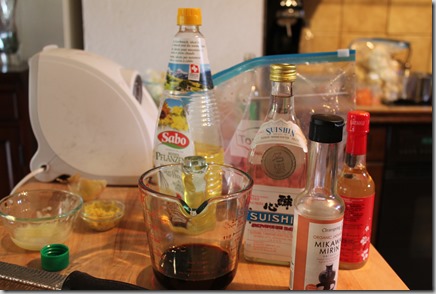
IMG_7002

¼ Cup Low Sodium Soy Sauce

¼ Cup Sake

¼ Cup Rice Wine Vinegar

¼ Cup Mirin

½ Cup Vegetable or grape seed oil (DO NOT use EVOO as it is not a flavorless oil and the fresh olive flavor doesn’t really fit with Asian cooking)

2 Garlic Cloves (minced or you can use a garlic press)

Half a small white onion (grated)

1 Tbsp of fresh ginger (grated)

A Note on Grated Onions and Ginger:

I recently began grating rather than mincing ginger as I find the texture much more appealing especially when the ginger ends up in the final dish rather than just the marinade. You can use the smallest side of a box-grater, but a fine plane-grater is much better. As far as the onions go, for a marinade, this simply releases more flavor although mincing is generally fine too.

For the Stir Fry:

Vegetable or grape seed oil for cooking (same comment, DO NOT use EVOO)

~2 lbs of beef in smallish cubes (your choice on cut – sirloin keeps the cost down though this does well with a fillet as well – I’ve also done this recipe with lamb loin and it was absolutely fantastic)

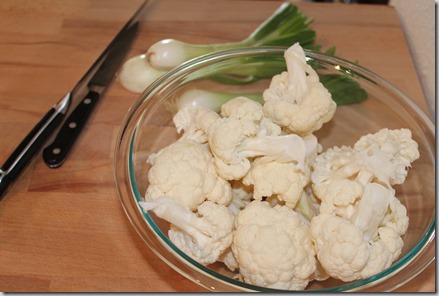
1 head of cauliflower (grated – this is the faux rice)

2 cups of sliced mushrooms (I think shitakes really make the dish shine but regular white mushrooms are okay too)

2 medium zucchinis halved lengthwise and sliced

4 scallions chopped on bias separate whites and greens (use 3 if they are really big)

2 Garlic Cloves (minced or you can use a garlic press)

1 Tbsp of fresh ginger (grated)

½ Cup of chopped Thai basil (optional)

A sprinkling of sesame seeds (optional)

Soy sauce, mirin and rice wine vinegar to season

Sambal Oleke as a garnish (if you like some kick)

A Note on Grated Cauliflower:

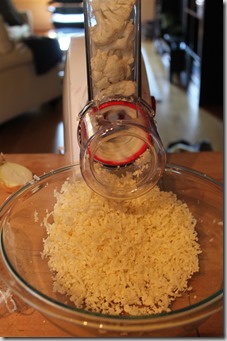
This is a really cool technique, one that I think is akin to spiralizing vegetables and using them as faux pasta. However, in this case, we are grating cauliflower to use in place of rice. It is very easy and you can use either the large side of a box-grater or a food processor if you have the right attachment (which is what I used in the picture below).

IMG_7000

IMG_7003

A Note on Stir Frying:

If you own an actual round-bottom carbon-steel wok with a wok ring adapter for your range, then you probably know WAY more than I do about stir-frying so you can skip this section (or this recipe altogether as you’re probably going to tell me that stir-frying is a Chinese cooking technique and these are Japanese / pan-Asian flavors, blah blah…). However, for all of us who learned western cooking first, even if you do own a wok, I would offer a couple of comments. First, woks are the traditional pans used for stir-frying. The problem is that a real wok completely rounded, which obviously doesn’t really work on the large majority of cook-tops.

clip_image002

The primary reason for the shape is its versatility: if this is the only pan you own, you can use it to steam, boil, deep-fry, sauté, roast, etc. In addition, the shape becomes incredibly important for stir-frying for a couple of reasons. First, the heat is concentrated at the very bottom of the pan allowing for it to get very hot very quickly after the cooking process cools it down. In addition, it allows the chef to push various elements up the side of the pan to increase the heat to some components while decreasing the heat to others. That’s all very interesting (and, by the way, the reason that I threw out my flat-bottom All-Clad wok as it is nothing but a large sauté pan with curved sides) but how do we replicate this technique with tools that almost every kitchen has? I find that the best result comes by par-cooking most elements separately before combining them in the end. That may sound a little more complicated but believe me, it’s well worth the effort.

1) Put the pieces of meat in the bag with the marinade and place in the refrigerator for at least 3 hours

2) Blanche the zucchini

How to Steam Blanch Zucchini thumbnail

1. Bring a large pot of salted water (should taste like the ocean) to boil

2. Add zucchini and cook until the pieces are still holding their shape but fork tender

3. Remove from boiling water and shock in a pre-prepared ice bath immediately to stop the cooking

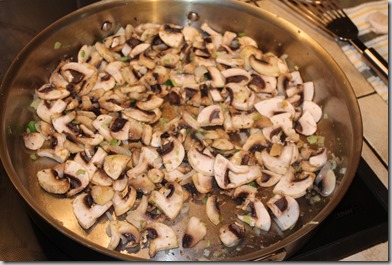
3) Sauté the mushrooms (might have to do in two batches depending on your pan and feel free to add a few scallions as I have done below)

IMG_7004

1. Place a large skillet over the stove on medium-high heat

2. When the pan is hot add enough oil to lightly coat the bottom of the pan

3. Add the mushrooms making sure there are not too many in the pan so they are crowded (if the mushrooms are crowded they will steam, not brown)

4. Sauté, adding a little salt to taste and set the mushrooms aside

5. Repeat the process if your pan was too small to do them all at once

4) Sear the beef – this part is very important because the beef WILL NOT brown unless it is done during this step

1. Remove the beef from the fridge at least an hour before cooking to allow it to come up to room temperature

2. Dry the beef thoroughly after removing it from the marinade

3. Place a large skillet (I like to use cast iron for meats) over the stove on medium-high heat

4. When the pan is hot add enough oil to lightly coat the bottom of the pan

5. Add the steak pieces making sure there are not too many in the pan so they are crowded (same comment here about steaming)

6. Quickly sear the beef making sure that each side browns but also that the beef doesn’t get overcooked (if the pieces are thin they should only be in the pan for 1 – 2 minutes each side)

7. Repeat the process if your pan was too small to do them all at once

5) Combine and finish the stir-fry

1. Place a large sauté pan on the stove over medium-high heat

2. Once the pan is hot, add enough oil to coat the pan and add the ginger, garlic, and the whites of the scallions

3. Sauté briefly until the aromas are released

4. Add the mushrooms, zucchini, and beef sequentially stirring as they are added to ensure the ingredients mix

5. Add the cauliflower and sauté with the other ingredients for about two minutes until it heats up, add a bit of soy sauce (maybe 3 tbsp, mirin (a bit less) and just a dash of rice wine vinegar

6. Cover the sauté pan and to let the cauliflower steam and soften a bit – 3 – 5 min

7. Add the sesame seeds and basil and toss

6) Serve in bowls with a bit of sesame seed, basil and sambal oleke garnish

I hope you all enjoyed this.  I promise that there will be more coming soon and I’ll try not to make all of them so complicated.  Keep reading for the next episode of Cooking with Bo.

Share Button
Follow:

Cooking with Bo: Summer Gazpacho

Nothing screams summer quite like a cold soup and when I think of cold soup, I think of gazpacho.

gazpacho

Now, I know that there are other cold soups: cucumber, melon, vichyssoise, the list goes on. That said, gazpacho has always been my favorite. The ripe summer tomatoes, the slight spice, and the complexity of the herbs and vegetables all complement each other perfectly. Add the fact that this soup is, by its very nature vegan, raw and can be gluten-free, and you have the perfect healthy dish for any hot summer day.

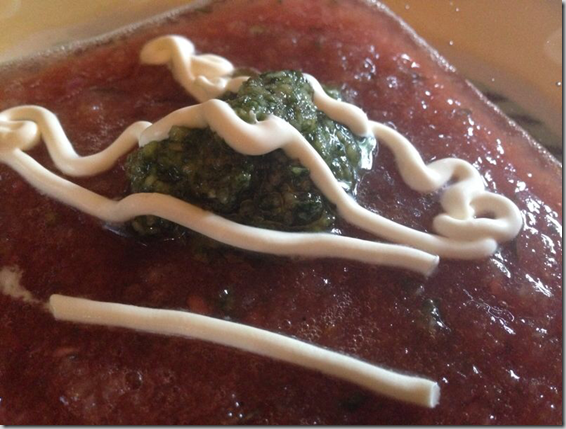
Many of you may know that gazpacho comes in many forms. There are variations with melon, various types of citrus, yellow tomatoes (if you can find them this is a beautiful soup) and many other twists on the basic formula. In addition, the garnishes can be simple (one piece of cilantro for example) or more complex (last night’s had a cilantro pesto (Spanish variation on the Italian classic) along with some crème fresh). Also, the consistency of gazpacho varies significantly. You can find gazpacho that is chunky and crunchy where you will actually end up chewing the soup, or smooth and totally pureed.

Personally, I prefer smooth gazpacho not only because the flavors blend better but the prep work is also much easier as long as you have a good blender (you don’t have to chop the veggies in even pieces for example).

Below you’ll find the recipe for last night’s gazpacho and the pesto garnish. Just as a note, I omitted the EVOO and the bread to keep it healthy and gluten-free. Enjoy!

One final thing – a quick trick to peel tomatoes: bring a pot of water to boil, cut X’s in the bottom of the tomatoes with a paring knife and plunge them in the water for 30 sec to 1 min.  When they come out, you should be able to pull the skin easily from the bottom of the tomato.

Ingredients:

For the gazpacho:

10 medium ripe tomatoes, peeled and chopped

1 medium red onion, chopped

1 cucumber, peeled, seeded, chopped

1 red or yellow bell pepper seeded and chopped

2 stalks celery, chopped

2 Tbsp chopped fresh parsley

2 Tbsp chopped fresh chives

1 clove garlic, minced (use of a garlic press is okay)

1/4 cup red wine vinegar

1/4 cup olive oil (optional)

1/4 cup of day old bread to thicken (optional)

2 Tbsp freshly squeezed lemon juice

2 teaspoons sugar

Salt and fresh ground pepper to taste

A few drops of Tabasco sauce to taste

For the pesto:

2 cups of cilantro leaves packed

1/3 cup raw white almonds (don’t use the type with brown skin – if you can’t find white almonds use pine nuts)

1/4 cup EVOO (plus more if needed)

salt and pepper to taste

Preparation (this is the easy part):

For the gazpacho:

Combine all ingredients in a blender and blend until smooth.

For the pesto:

Combine all ingredients in a small food processor and mix until smooth.

Serving:

Put a serving of gazpacho in a bowl.  Top with one spoonful of pesto and one of crème fresh.

Do you have any gazpacho variations or garnishes that you particularly enjoy?

Share Button
Follow: