Cooking with Bo: Summer Gazpacho

Nothing screams summer quite like a cold soup and when I think of cold soup, I think of gazpacho.

gazpacho

Now, I know that there are other cold soups: cucumber, melon, vichyssoise, the list goes on. That said, gazpacho has always been my favorite. The ripe summer tomatoes, the slight spice, and the complexity of the herbs and vegetables all complement each other perfectly. Add the fact that this soup is, by its very nature vegan, raw and can be gluten-free, and you have the perfect healthy dish for any hot summer day.

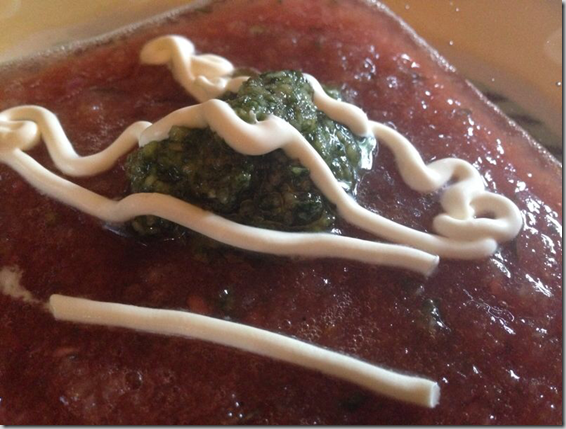
Many of you may know that gazpacho comes in many forms. There are variations with melon, various types of citrus, yellow tomatoes (if you can find them this is a beautiful soup) and many other twists on the basic formula. In addition, the garnishes can be simple (one piece of cilantro for example) or more complex (last night’s had a cilantro pesto (Spanish variation on the Italian classic) along with some crème fresh). Also, the consistency of gazpacho varies significantly. You can find gazpacho that is chunky and crunchy where you will actually end up chewing the soup, or smooth and totally pureed.

Personally, I prefer smooth gazpacho not only because the flavors blend better but the prep work is also much easier as long as you have a good blender (you don’t have to chop the veggies in even pieces for example).

Below you’ll find the recipe for last night’s gazpacho and the pesto garnish. Just as a note, I omitted the EVOO and the bread to keep it healthy and gluten-free. Enjoy!

One final thing – a quick trick to peel tomatoes: bring a pot of water to boil, cut X’s in the bottom of the tomatoes with a paring knife and plunge them in the water for 30 sec to 1 min.  When they come out, you should be able to pull the skin easily from the bottom of the tomato.

Ingredients:

For the gazpacho:

10 medium ripe tomatoes, peeled and chopped

1 medium red onion, chopped

1 cucumber, peeled, seeded, chopped

1 red or yellow bell pepper seeded and chopped

2 stalks celery, chopped

2 Tbsp chopped fresh parsley

2 Tbsp chopped fresh chives

1 clove garlic, minced (use of a garlic press is okay)

1/4 cup red wine vinegar

1/4 cup olive oil (optional)

1/4 cup of day old bread to thicken (optional)

2 Tbsp freshly squeezed lemon juice

2 teaspoons sugar

Salt and fresh ground pepper to taste

A few drops of Tabasco sauce to taste

For the pesto:

2 cups of cilantro leaves packed

1/3 cup raw white almonds (don’t use the type with brown skin – if you can’t find white almonds use pine nuts)

1/4 cup EVOO (plus more if needed)

salt and pepper to taste

Preparation (this is the easy part):

For the gazpacho:

Combine all ingredients in a blender and blend until smooth.

For the pesto:

Combine all ingredients in a small food processor and mix until smooth.

Serving:

Put a serving of gazpacho in a bowl.  Top with one spoonful of pesto and one of crème fresh.

Do you have any gazpacho variations or garnishes that you particularly enjoy?

Share Button
Follow:

Cooking With Bo: Healthy Chicken Fajitas with Fresh Pico de Gallo

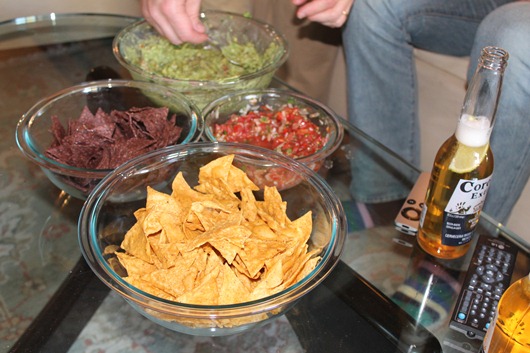
Ashley mentioned that there has readers and our friends alike requested the recipe from our fun post-race Mexican dinner on Sunday night.

IMG_5948

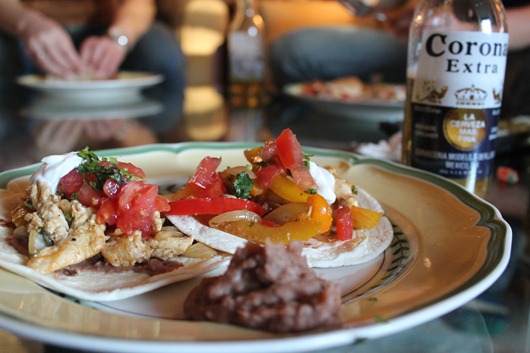
I’m happy to oblige as I loved the final result! I’ll first say that I’ve never really studied Mexican cooking; I just love it and have always experimented with it. I do really want to learn more including how to cook the many delicious braises that are always bursting with flavor and spice. That said, one of my go-to simple and incredibly delicious Mexican dishes is chicken fajitas with fresh pico de gallo.

You can make these with any part of the chicken but if you want to keep it super lean and healthy, I recommend boneless, skinless breasts. One of the keys to good chicken fajitas (especially if you use boneless breast) is a good marinade. The other keys are very fresh ingredients and just a little patience when it comes to prep work.

Chicken Fajitas with Fresh Pico de Gallo

IMG_5950

Ingredients (Makes enough for 4 – 6):

For the Fajitas:
8 small corn or flour fajitas
4 boneless-skinless chicken breasts
2 medium yellow onions
2 bell peppers (color up to you)
Vegetable oil (for sautéing)

For the Marinade:
Juice of 1 Orange
Juice of 1 Lime
4 tablespoons of EVOO
3 tablespoons of fresh minced cilantro (coriander if you’re British)
1 tablespoon of cumin
1 tablespoon of chili-powder
1 tablespoon of fresh minced white onion
1 teaspoon of fresh minced garlic
1/2 teaspoon of salt
1/2 teaspoon of fresh ground black pepper
1/4 teaspoon of cayenne pepper (optional)
Minced jalapeños for extra heat (optional)

For the Pico de Gallo:
Two large tomatoes (diced into small squares)
One Jalapeño Pepper (seeded and minced) (more if you like it spicy)
One small white onion (minced)
1 garlic clove (minced)
Juice of 1/2 – 1 lime (to taste)
Minced cilantro (to taste – I like lots, like a half a bunch you would buy at the grocery store)
Salt and pepper to taste

Instructions:
1) Combine marinade ingredients in a glass bowl or a Ziplock bag. With a sharp knife, pierce the chicken breast a few times so that the marinade fully penetrates the chicken. Place the chicken in the marinade and put in the refrigerator for at least 1 hour and up to 4 hours.

2) While the chicken is marinating, do the rest of the prep work (again, if you might need to have some patience unless you’re really fast with a knife). Start with the onions and the bell peppers. Cut off the tops and bottoms of the onions and slice into strips along the grain (they will soften more easily this way). Then cut the bell peppers in half vertically and seed them. Cut out the top and slice into strips about a half an inch wide. Put the onions and the bell peppers aside separately and proceed with the prep work for the pico de gallo. First, dice the tomatoes. I find it easiest to fist cut the tomatoes vertically and then notch out the tops. Then lay the halves on their sides and slice vertically into strips cutting almost to the root end making sure that the tomato is still together. Then cut one or two slices horizontally again, not all the way through. You should now have a tomato half that can be easily diced simply by cutting vertically across the tomato. Now mince the white onion. Again, one more technique. Peel the onion skin and then cut the onion in half through the root end. Cut the top end off but leave the root end on. Make vertical cuts close together from the tip to close to the root, then slice across the grain to make quick work of the mincing. Finally mince the jalapeño after seeding it (or include the seeds if you like it spicy) but be careful, if you touch any part of your face after mincing a raw jalapeño, IT WILL BURN. Finally, mince the garlic clove in the normal way (really just rapid chopping – if anyone has a great garlic mincing trick please don’t hesitate to share).

3) To assemble the pico, leave the tomatoes in a colander for 30 minutes over a bowl while the juices drain (this is so the pico isn’t too wet). After 15 minutes, add the rest of the ingredients except the lime juice and the salt and pepper and mix together to let the flavors mingle. Finally after another 15 minutes, transfer to a bowl, add the lime juice and salt and pepper to taste.

4) To cook the fajitas, first take the chicken out of the refrigerator, pound the breasts to tenderize them, and slice the chicken into strips. Put a large sauté pan on medium heat and once its heated add a bit of oil and add the onions. Cook the onions until they soften and slightly browned, making sure that they don’t burn. Remove the onions to a bowl and cook the bell peppers in the same way. Finally, turn the heat up to medium-high and cook the chicken pieces until they brown slightly. Deglaze the pan with a little bit of the marinating liquid making certain that it heats up enough to kill any germs (it has been in contact with raw chicken). Add the onions and peppers back to the pan and mix together.

5) Heat the tortillas on a pan and add a bit of the fajita mixture, some pico and a little cheese or sour-cream and a bit of fresh minced cilantro.

I hope you enjoyed this episode of Cooking with Bo.  Does anyone have any favorite Mexican recipes that they would like to share? Or recipe requests for next week?

Share Button
Follow:

Cooking with Bo: The 6 Minute Egg

If you’ve followed this blog for any time at all, you know that my husband Bo has a passion for cooking. He was raised in a home that appreciated cooking and was introduced to French food and many cooking methods by his mom at an early age. Now, any free weekend night he craves nothing more than spending time in the kitchen with me, experimenting and testing new recipes. He is definitely the stronger cook between the two of us though I’ve learned a few tricks from him in our 11 years together. Starting with today’s post you’ll start seeing more frequent guest posts from him revolving around one of his favorite topics – cooking! Now, without further adieu, I’ll turn it over to Bo!

IMG_4825

Many great chefs have written many things about eggs.  Perhaps no ingredient other than salt is so often spoken of in cookbooks.  However, as an amateur chef, it is actually quite difficult to fully appreciate why this simple ingredient is so lauded by the greatest professionals.

This is not a post on eggs in general but I do feel that it’s important to explain how I’ve finally started to understand the importance of the egg in the culinary arts. I’ve always been a huge fan creating my own omelets.  They are a delicious meal at any time of the day and also can be filled with any leftover ingredient in the fridge that are about to be thrown away.  Historically, that is largely the extent of my experience with egg cookery.

However, since the beginning of the year, I’ve begun to experiment with custards, sauces of the hollandaise family (including béarnaise sauce, etc.) and the inclusion of eggs in a variety of dishes.  In addition, as I read more and more recipes and become more and more experienced in various forms of cooking, understanding the power of the egg in patisserie, as a binding agent for all manner of things from emulsions to breading for meat, and as an ingredient to create volume has become increasingly clear to me.

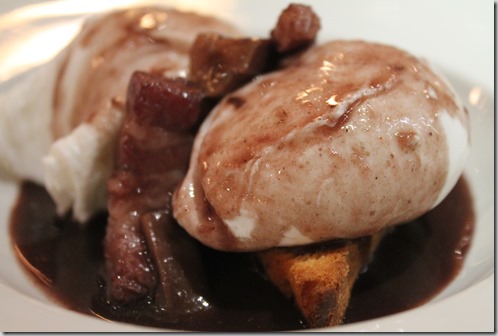
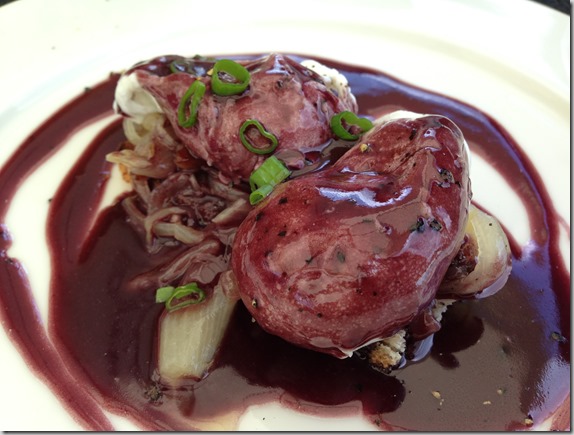
The general power of the egg aside, this post is about one of the most simple forms of egg cookery though amazingly versatile and totally delicious.  I was recently flipping through Julia Childs’ Mastering the Art of French Cooking while looking up the recipe for oeufs en meurette au vin rouge. If you’ve never enjoyed eggs poached in red wine, it is an amazingly delicious dish in which eggs are poached in beef stock and red wine which is then reduced to make a sauce for the eggs.

IMG_44592013-09-01 12.44.32

A few pages in, I came across her description of “6 Minute Eggs”.   I have always been a fan of poached eggs; in my opinion they are the perfect way to eat an egg in the morning.  If they are cooked properly, the yolks are warm but not yet set, and the whites are gathered and firm.  Once it is placed atop a piece of lightly buttered toast, seasoned with some salt and pepper and served with a piping hot cup of coffee and a bit of fresh fruit, it becomes almost the perfect breakfast.

The biggest issue with poached eggs is that they require quite a lot of attention and TLC.  In addition, the eggs must be very fresh or the whites will not hold together when dropped in the water.  You then must ca\refully monitor the water as it must stay at a very low simmer lest the action of the boiling water damage the egg.

The six-minute egg is not as elegant or impressive as poached eggs if you have guests but it has the identical flavor and texture and is far simpler to cook multiple eggs at once.  In addition, if you don’t have experience poaching eggs this is a very easy way to get a similar result.  The recipe is literally three simple steps.  First, bring a pot of water to boil (enough water to cover the eggs).  Second, carefully place as many eggs in the water as you care to cook and place a timer on 6 minutes.  Finally, once the timer goes off place take the eggs out of the water with a slotted spoon, and place them in a colander – then run cold water over the eggs to stop the cooking.

6 minute egg

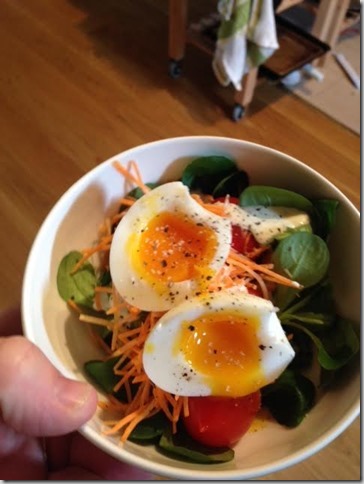
The result is an egg in its shell with whites that are firm enough to allow you to peel the shell but a yolk that remains unset and creamy.  They can either be consumed immediately when they are still warm, eaten cold (on a salad for example), or reheated by simply placing them in boiling water for about one minute out of the fridge.  This has now become a staple in our fridge as making a salad for lunch or dinner has never been easier if you have delicious protein in the form of a gooey egg with which to top the meal.  I really hope this is helpful and you all will experiment with adding a six-minute egg to any light dish.

What are your favorite egg dishes?

Share Button
Follow: